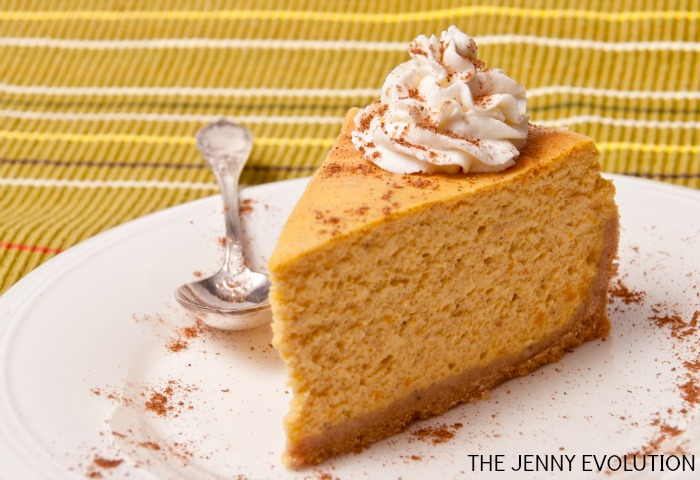
The Cheesecake Factory Pumpkin Cheesecake Copycat Recipe
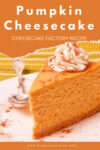


Prepare to indulge in a slice of seasonal bliss with our take on the legendary Cheesecake Factory Pumpkin Cheesecake.
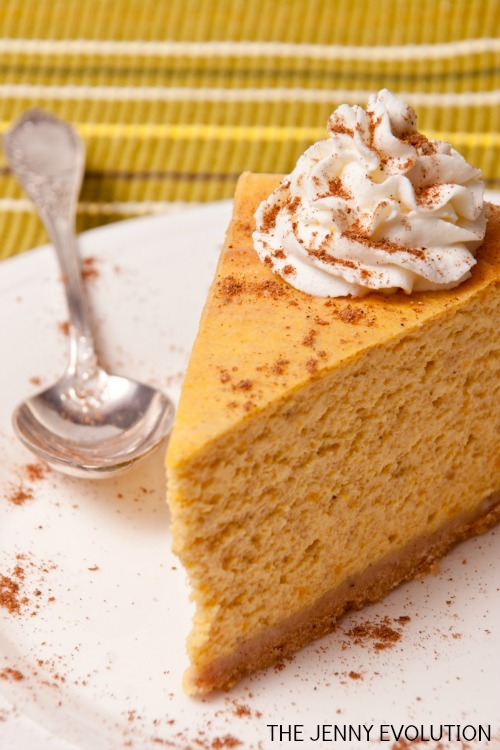
This cheesecake is the epitome of fall, with its creamy pumpkin-infused filling, aromatic spices, and a buttery graham cracker crust that cradles each heavenly bite.
Topped with a swirl of whipped cream, this dessert is a symphony of textures and flavors that will transport your taste buds to a cozy, pumpkin-spiced haven – it will become one of your favorite Cheesecake Recipes!
This post contains affiliate links.
As the leaves start to turn and a crispness fills the air, there’s no better way to embrace the flavors of autumn than with the rich and velvety taste of pumpkin.
Whether you’re looking to impress your guests at a holiday gathering or simply craving a taste of the season, our Cheesecake Factory-inspired Pumpkin Cheesecake is a slice of fall that you won’t want to miss.
Cheesecake Factory Pumpkin Cheesecake is probably one of my most popular recipes — and for good reason — it’s AMAZING!
Even though this is supposed to be a “copycat recipe,” this cheesecake is superior in many ways because you choose where the ingredients come from, and you know they’re the fresh and the real thing.
It’s really hard to properly enjoy a dessert like this after a full meal.
That’s why they hope you’ll spend 6-8 bucks on a slice, or better yet take home a whole cake.
But you can make it at home for a fraction of the cost, and you can be assured that your ingredients are the freshest and healthiest too.
I remember the first time I discovered these cheesecakes.
My mom and I had gone out to lunch.
We were waiting for a table.
And there, in the waiting area, was that magnificent glass case full of cheesecakes.
I had no idea you could buy a full cheesecake! But the price was … well… whew!
So, grab your fork and savor the warmth, comfort and flavors of the Cheesecake Factory pumpkin cheesecake without the price.
Table of Contents
Why You’ll Love This Recipe
Here’s why you’ll love this Cheesecake Factory Pumpkin Cheesecake recipe!
- Warm Spices: Infused with cinnamon, ginger, and cloves, the cheesecake layer offers a comforting, spiced flavor profile that complements the other components.
- Impressive Presentation: Topped with whipped cream and toasted pecans, this cheesecake is as visually stunning as it is delicious.
- Perfect for Special Occasions: Ideal for fall gatherings, Thanksgiving or any celebration where a show-stopping dessert is desired.
This recipe will become your new go-to dessert for special occasions!
What To Serve With Pumpkin Cheesecake
This rich, spiced dessert pairs beautifully with lighter accompaniments and warm drinks that balance its creamy texture and pumpkin flavor:
- Whipped cream or cinnamon whipped topping: Adds lightness and enhances the warm fall spices.
- Hot coffee or espresso: The bitterness balances the sweetness and richness of the cheesecake.
- Chai tea or spiced black tea: Echoes the cinnamon, nutmeg, and pumpkin spices perfectly.
- Fresh berries: Raspberries or strawberries add a bright, tart contrast.
- Candied pecans or toasted walnuts: A crunchy topping that complements the creamy filling.
These pairings make pumpkin cheesecake feel indulgent yet balanced, perfect for holidays, dinner parties or cozy fall desserts.
Can Cheescake Be Left Out Overnight
You should not leave cheesecake out at room temperature overnight as it can lead to food safety concerns.
Cheesecake is a dairy-based dessert, and dairy products are susceptible to bacterial growth at temperatures above 40°F (4°C).
If cheesecake is left unrefrigerated for an extended period, it can enter the “temperature danger zone” (between 40°F and 140°F or 4°C and 60°C), where bacteria can multiply rapidly.
This can potentially lead to food-borne illnesses.
To keep cheesecake safe and delicious, it should be stored in the refrigerator if not being consumed immediately.
If you need to store it for a longer period, freezing is a better option.
If cheesecake is left out at room temperature overnight, it’s advisable to discard it to ensure food safety.
Cheesecake Factory Pumpkin Cheesecake Ingredients
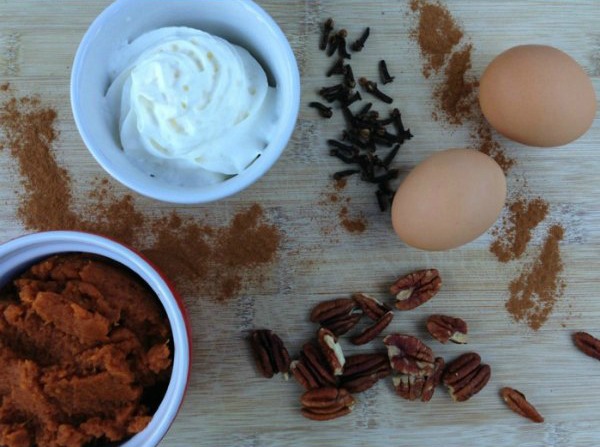
To make this Cheesecake Factory pumpkin cheesecake, you’ll need the following ingredients:
- unsalted butter
- graham cracker crumbs
- sugar
- salt
- cream cheese
- sour cream
- canned pumpkin
- eggs
- vanilla extract
- ground cinnamon
- ginger, ground
- cloves, ground
- whipped cream
- toasted pecans
Kitchen Tools You’ll Need
To prepare the Copycat Cheesecake Factory Pumpkin Cheesecake with Pecans, you’ll need the following kitchen tools:
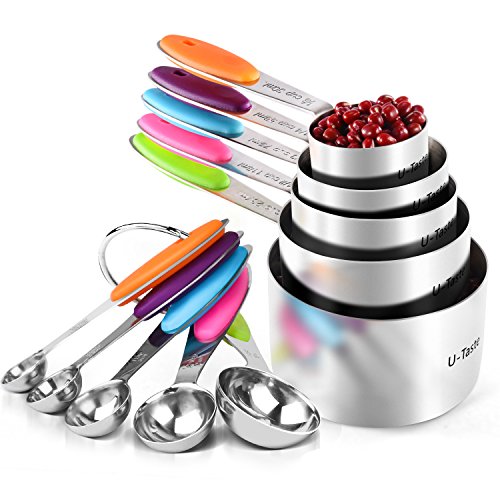
- Measuring Cups and Spoons: For accurately measuring ingredients such as graham cracker crumbs, sugar, and spices.
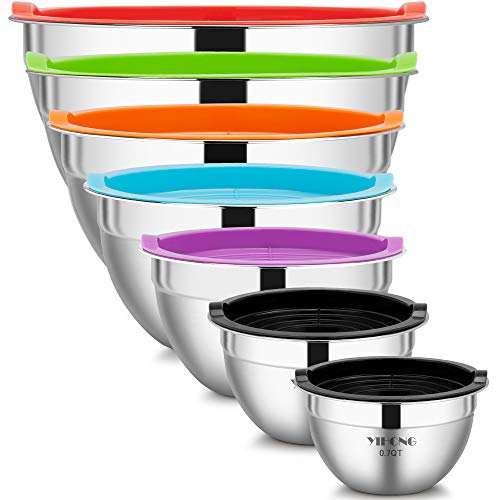
- Mixing Bowls: To combine crust ingredients and cheesecake batter separately.
- 10-Inch Springform Pan: To bake the cheesecake, allowing for easy removal and presentation.
- Food Processor: For finely grinding graham crackers into crumbs for the crust.
- Hand Mixer or Stand Mixer: To achieve a smooth and creamy cheesecake batter by thoroughly blending the cream cheese and other ingredients.
- Spatula: For scraping down the sides of mixing bowls and ensuring all ingredients are well incorporated.
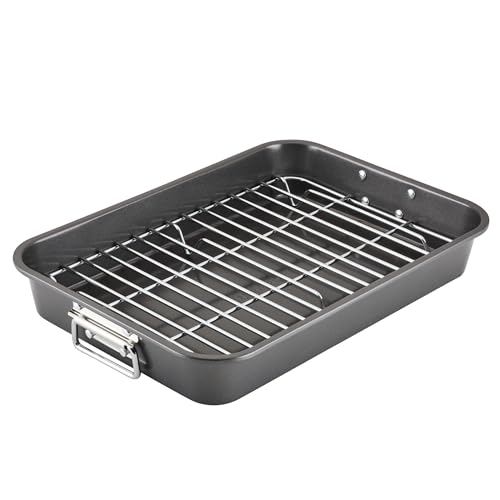
- Roasting Pan: To create a water bath (bain-marie) for the cheesecake, promoting even baking and minimizing cracks.
- Aluminum Foil: To wrap the outside of the springform pan, preventing water from the bain-marie from seeping into the cheesecake.
- Kettle or Large Pot: To boil water for the bain-marie.
- Oven Mitts: For safely handling hot cookware when placing and removing the cheesecake from the oven.
- Cooling Rack: To allow the cheesecake to cool evenly before refrigerating.
- Knife: For slicing the cheesecake into individual servings.

These tools will assist you in creating a rich and creamy pumpkin cheesecake, reminiscent of The Cheesecake Factory’s seasonal favorite.
The combination of spiced pumpkin filling and crunchy pecans offers a delightful dessert, perfect for autumn gatherings or special occasions.
Directions for Cheesecake Factory Pumpkin Cheesecake
1. Preheat oven to 325 degrees Fahrenheit with rack in the center position.
2. Using some of the butter, coat a 10-inch springform pan.
3. In a mixing bowl, mix the rest of the butter with the graham cracker crumbs, 1/4 cup of the sugar and a pinch of salt.
4. Packing it tightly and evenly, press the crumb mixture into the bottom and up the sides of the pan.
5. Bake for 15 to 20 minutes, until golden brown.

6. After cooling on a rack, wrap the outside of the springform pan with aluminum foil.
7. Place the wrapped pan into a roasting pan.
8. In a medium pot, bring water to a boil.
9. While waiting for water to boil, using a mixer; beat the cream cheese with a mixer until smooth.
10. Add the rest of the sugar and beat until just light.
Scrape down bowl sides and beaters as needed.
11. Whip in the sour cream.
12. Add the pumpkin, eggs, vanilla, 1 teaspoon salt and the spices.
13. Whip until just mixed and once done, pour into the cooled crust.
14. Without pulling the rack out, gently place the roasting pan in the oven.
15. Pour the boiling water into the roasting pan until it comes about halfway up the side of the springform pan.
16. Bake the cake about 1 hour 45 minutes, or until the outside of the cheesecake sets but the center is still loose.
17. Turning off the oven; open the door briefly to let out some heat.
18. After leaving the cheesecake in the oven for 1 more hour, carefully remove the springform pan from the roasting pan.
19. Cool on a rack for at least an hour.
20. Run a knife around the edges to loosen it somewhat, and then cover pan and place in refrigerator for at least 8 hours or even overnight.
21. 60 minutes before serving, bring the cheesecake to room temperature.
22. Unlock and remove the springform ring.
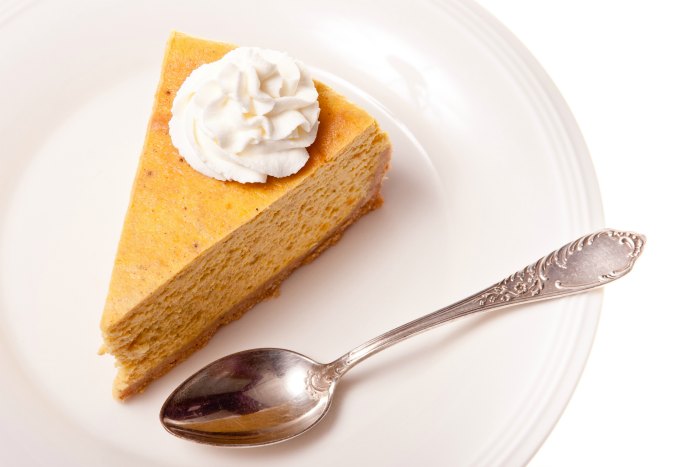
23. Place a spoonful of the whipped cream on each slice.
24. Top with a sprinkle of the toasted pecans.
More Cheesecake Recipes
Discover more irresistible cheesecake recipes, from classic favorites to creative new flavors!
- Easy No Bake Cheesecake
- Chocolate Cheesecake
- Cheesecake Cupcakes
- Churro Cheesecake
- Cheesecake Cookie Cups
- Strawberry Cheesecake
- Cheesecake Ice Cream
For more mouth-watering cheesecake recipes!
The Cheesecake Bible: 300 Sweet and Savory Recipes for Cakes and More Junior’s Cheesecake Cookbook: 50 To-Die-For Recipes of New York-Style CheesecakeThe Cheesecake Factory Copycat Recipes: Replicate The Most Wanted Recipes From Your Favorite Restaurant at HomeThe Eli’s Cheesecake Cookbook: Remarkable Recipes from a Chicago Legend


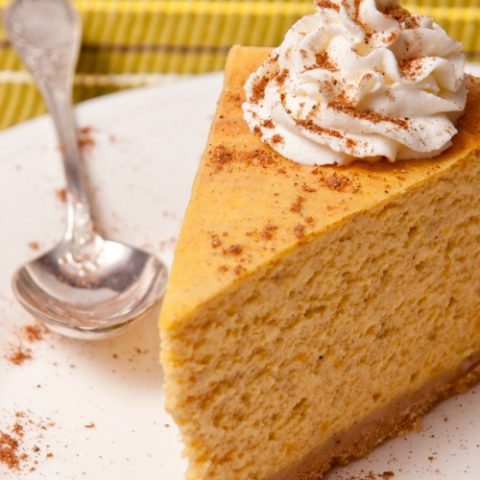
The Cheesecake Factory Pumpkin Cheesecake Copycat Recipe
Love The Cheesecake Factory's Pumpkin Cheesecake? Then you'll love this Pecan-Topped Pumpkin Cheesecake Copycat Recipe!
Ingredients
- 12 tablespoons melted unsalted butter
- 2 1/2 cups graham cracker crumbs
- 2 3/4 cups sugar
- Salt
- 2 pounds room temperature cream cheese
- 1/4 cup sour cream
- 1 15-ounce can pure pumpkin
- 6 large room temperature, lightly beaten eggs
- 1 tablespoon vanilla extract
- 2 1/2 teaspoons ground cinnamon
- 1 teaspoon ginger, ground
- 1/4 teaspoon cloves, ground
- 2 cups whipped cream, sweetened
- 1/3 cup roughly chopped, toasted pecans
Instructions
- Preheat oven to 325 degrees Fahrenheit with rack in the center position.
- Using some of the butter, coat a 10-inch springform pan.
- In a bowl, mix the rest of the butter with the graham cracker crumbs, 1/4 cup of the sugar and a pinch of salt.
- Packing it tightly and evenly, press the crumb mixture into the bottom and up the sides of the pan.
- Bake for 15 to 20 minutes, until golden brown.
- After cooling on a rack, wrap the outside of the springform pan with aluminum foil.
- Place the wrapped pan into a roasting pan.
- In a medium pot, bring water to a boil.
- While waiting for water to boil, using a mixer; beat the cream cheese until smooth.
- Add the rest of the sugar and beat until just light. Scrape down bowl sides and beaters as needed.
- Whip in the sour cream.
- Add the pumpkin, eggs, vanilla, 1 teaspoon salt and the spices.
- Whip until just mixed and once done, pour into the cooled crust.
- Without pulling the rack out, gently place the roasting pan in the oven.
- Pour the boiling water into the roasting pan until it comes about halfway up the side of the springform pan.
- Bake the cake about 1 hour 45 minutes, or until the outside of the cheesecake sets but the center is still loose.
- Turning off the oven; open the door briefly to let out some heat.
- After leaving the cheesecake in the oven for 1 more hour, carefully remove the springform pan from the roasting pan.
- Cool on a rack for at least an hour.
- Run a knife around the edges to loosen it somewhat, and then cover pan and place in refrigerator for at least 8 hours or even overnight.
- minutes before serving, bring the cheesecake to room temperature.
- Unlock and remove the springform ring.
- Place a spoonful of the whipped cream on each slice.
- Top with a sprinkle of the toasted pecans.
Recommended Products
As an Amazon Associate and member of other affiliate programs, I earn from qualifying purchases.
-
 10 Inch Springform Pan
 -
Soft Silicone Oven Mitts
-
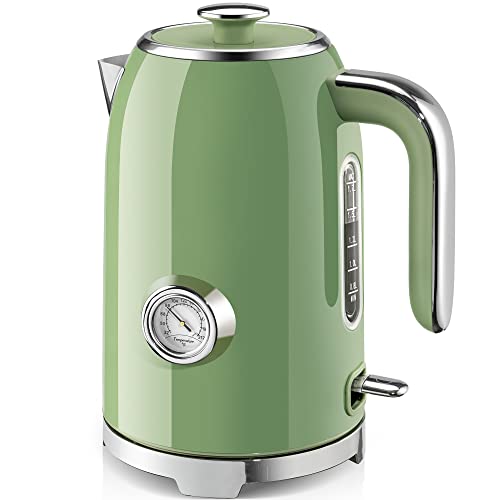
SUSTEAS Electric Kettle
-
Silicone Spatula Set
-
Ninja Food Processor
-
Stainless Steel Measuring Cups and Spoons Set
-
 Cuisinart Knife Set
 -
Metal Mixing Bowls with Lids
-
KitchenAid 9-Speed Hand Mixer
-
Roasting Pan with Flat Rack
-
KitchenAid Artisan Tilt-Head Stand Mixer with Pouring Shield
-
Cooling Racks


Nutrition Information:
Yield: 12 Serving Size: 1Amount Per Serving: Calories: 732Total Fat: 49gSaturated Fat: 25gTrans Fat: 0gUnsaturated Fat: 20gCholesterol: 133mgSodium: 377mgCarbohydrates: 69gFiber: 2gSugar: 55gProtein: 8g
Nutrient values are only estimates provided by online calculators. Various factors can change the nutritional information in any given recipe.
For more mouth-watering cheesecake recipes!
The Cheesecake Bible: 300 Sweet and Savory Recipes for Cakes and MoreJunior’s Cheesecake Cookbook: 50 To-Die-For Recipes of New York-Style CheesecakeThe Cheesecake Factory Copycat Recipes: Replicate The Most Wanted Recipes From Your Favorite Restaurant at HomeThe Eli’s Cheesecake Cookbook: Remarkable Recipes from a Chicago Legend
Don’t miss out on our other family friendly recipes!
Oh my goodness. This combines so many of my favorite things. I’m pinning this, and I’m actually going to try making it.
Hee hee. Your family will thank you. This cheesecake really is quite delicious. Have fun making it and be sure to come back and tell me how you liked it 🙂
Followed directions exactly…. cake is not cooked through?! ?
I would definitely check your oven settings… cheesecake it very finicky. If your oven isn’t getting to the set temperature, it makes a big difference. (We had an oven that was consistently about 10 degrees cooler than what we were setting it for….)
I am having the same issue. My oven is brand new and electric. Could it be because electric isn’t as hot as a gas oven? At 1 45 minutes it looks like my whole cake is set but when I cut into it its not done. Should I leave it in longer?
It’s not the electric. It’s your oven. Get a oven gauge, turn your oven on 350°F, set or hang gauge in oven. When oven gets to 350°F check your guage. More than likely your oven heat isn’t as hot as what you set it as. It’s easy to fix. Google on how to get your electric oven higher. That’ll fix your problem! That’s what I had to do!!
Its not your oven, or the temp. Cheesecake doesn’t get it’s creamy texture until it cools completely, and sets. Bake it according to instructions. The cake shoupd still feel liquidy/jiggly in the center when you take it out of the oven. Let it cool in the turned off oven for 1 hour. Then, place it on a cooling rack for 1 hour. Then, place in refrigerator for 6-8 hours, and that’s where the magic happens.
cant wait to try this
Please do! And be sure to let me know how you liked it 🙂
Cheesecake? Pecans? SWOOON!
Thanks for sharing on Creative K Kids’ Tasty Tuesdays link up. Hope to see you back next week.
Ha! It is a fabulous combination…. and the holidays are the perfect time to indulge 😀
Hi Jenny! Wow! The cheesecake looks delicious! I sure wished my family liked pumpkin! I need to find someone who will help me eat this so I can make it! Thanks for sharing! Blessings from Bama!
They don’t like pumpkin! Oh that is a tragedy. I guess you’ll just have to eat the whole darn thing yourself 😉
I love the Cheesecake Factory! Thanks for sharing at the #HomeMattersParty – hope to see you again next week.
Thanks for sharing at the Inspiration Spotlight party. Shared. Have a great rest of your week.
This looks great. However I’m not a fan of cloves. Any substitutes? Thanks
I can’t really say there’s any substitute for cloves. But I did see on a couple of recipe message boards that people skip the cloves sometimes and their pumpkin recipes still turn out tasty.
You can use Nutmeg instead of or with Cloves I usually use both.I have not had any complaints so far ..
Great tip. Folks always have their own stylized taste.
Can this be frozen?
I don’t see why not! Just be sure to leave enough time for de-thawing. There’s nothing like cutting into the cheesecake and discovering the center is still frozen. ha!
Yes! I do it all the time after I cut it into slices but if you plan to eat the whole cake after thawing then freeze it whole!
I don’t have a 10 inch Springform pan.. can I Bake this in a 9 inch? If so how long do I bake this for? Thanks in advance!
I don’t know why you couldn’t bake this is a 9-inch springform… but I don’t know the exact baking timing. I would try it and watch carefully to make sure it doesn’t get overdone.
I work at the cheesecake factory in the bakery and I have to say this is very very close to our pumpkin cheesecake!
Hahah! Thanks for letting me know my recipe is so close!
Hello,
I have always made my cheesecakes in a 3 inch round cake pan…never had any issues….do you see any reason this cheesecake would not work in the cake pan?
You could make it in a cake pan; it’s more about getting the cheesecake out when you’re done. Springforms are just that much easier to get your cake or cheesecake out.
Looks pretty spot-on to the slice that my bestie & I shared @ lunch, today …. about the only thing I’d do differently is to use gingersnaps (instead of graham crackers), for the crust – thank you for posting this!
Ooo. Using gingersnaps would taste awesome!
Gingersnaps are wonderful for this particular type of cheesecake – I also do this, for pumpkin pie (throw in some chopped crystallized ginger, for added chew and zing!)
We wound up using some gluten-free gingersnaps (from Trader Joe’s, which already have chunks of crystallized ginger; for non gluten-free crust, go ahead and use their ‘triple-ginger’ gingersnaps *or any decent gingersnap cookie, really!*) and they worked fine.
My only issue, here, is that this recipe called for WAAAAAY too much butter, for the crust! Next time, I think I will cut the butter down to 3 or 4 tbsp! Otherwise, the cheesecake, itself, was pretty much spot-on! 😀
I couldn’t agree with this reply more! We use GF ginger snap cookies for our crust! We also had to remake the cheesecake due to way too much butter the first time it seeped through the springform pan all over the oven. Cut the butter back to 4 tablespoons and it was perfect!
Just made this cheesecake and I also cut down on the butter as I thought it was way too much. Will see how the crust is. Baking now.
Sooooo…. how did the crust come out with less butter???
I just saw on Pinterest that someone used your picture – the pumpkin slice photograph with your site name across the bottom – she cut off your words, but it’s clearly your image.
Do you happen to have the Pin URL? Thanks.
After cooking for the 1 hour 45mins and turning off the oven, can I just leave the cheesecake in the oven over night or do you think it’s best to take it out and put it in the fridge?
I definitely wouldn’t keep cheesecake in the oven overnight… personally I’d wait until I had to remove it from the oven (before bed) and then move it to the counter to cool down.
Is 1 tsp salt right? I just made the filling and it tastes awfully salty. It doesn’t specify in the ingredients list, but the instructions say 1 tsp. Thanks
It is 1 tsp. in the filling… but make sure you’re using unsalted butter for the filling as well.
This recipe turned out so well! Made it into cheesecake cupcakes and baked it for 30-35min. Will definitely make this again!
What a fun idea and new twist! Happy eating 🙂
Are you actually baking this essentially in water? or do you leave the roasting rack in the pan as Well?
Yes, you are basically baking this in the water… the springform goes in the roasting pan… and the water comes about halfway up the side of the springform pan.
How much water do you use, doesn’t say!
For the recipe, you pour the boiling water into the roasting pan until it comes about halfway up the side of the springform pan.
How long would this last in the fridge? I want to make it on Wednesday morning for Saturday afternoon. Thanks and can’t wait to try this!!
Food generally lasts 3-4 days in the fridge, so you should be okay. But if you can make it closer to the date you’re serving it, the fresher it will be. Enjoy the recipe!
Can I substitute gluten free graham crackers in the crust using all the other same ingredients?
I’ve never really worked with gluten free graham crackers and don’t know their consistency. If you do try it, let us know how it turns out!
Has anyone else reading these reviews used the gluten free graham crackers?
I am making it with a gf crust right now. I will let you know how it turns out.
Would this recipe work with a gluten free pre-made graham cracker pie crust? I’m sure I can cut the ingredients so there’s pie filling left over, but I wasn’t sure if the consistency would work still in a normal crust…?
Thanks in advance!
I use gluten free graham crackers for all my cheese cakes, and they work out great. This cheese cake is pumpkin, so i am going to use gluten free gingersnaps instead. I just crush them with a rolling pin, works out great.
Ooo. I bet those GF gingersnaps added some wonderful extra flavor! Thanks for sharing 😀
I have looked up other cheesecake recipes and haven’t seen the water thing … what is the purpose of that?
Hi, Melissa!
Some folx use a ‘water bath’ to keep the top of the cheesecake from cracking, on top. I’ve had mixed results, using such, plus you can always make a semi-sweet sour cream topping, or whipped cream, to disguise any cracks, if need be – it’s going to taste great, regardless! 😀
This is in the oven now, used a 10″ spring form pan, I had way too much filling, had to make another small one. What went wrong? 2lbs would be 4-8oz blocks right? Hoping this turns out.
What size springform pan should be used?
Can extra cheesecake filling be stored in the refrigerator? Or does it all have to be used right away?
Would this freeze well? Would like to make it ahead of time for Thanksgiving, but keep it fresh. 6 days away!
I want to make mini cheesecakes in a muffin pan. How would long would I have to cook them? And how many do you think I would get from your recipe?
Just made this pumpkin cheesecake. Followed the recipe.
Used a 9” pan and filling went right to the top to make a tall cheesescake like I like. Sides are cook and slight jiggle in center. Resting in oven now for it’s 1 hour. Little concern because of using a 9” instead of a 10”. And wondered if I need to add more time. I’ve made many cheesecakes and know what to look for so will see.
Trying this tonight! Question: What is the point of the roasting pan and boiling water?
Do you put the springform pan inside the water bath?
I made this cheesecake this past weekend for a mid thanksgiving dinner. We were finally able to enjoy it last night. It was AMAZING!!!! It even made my teenage daughters snapchat story so it must have been a win! I felt it was a bit undercooked but I’ll adjust a few temperature things and it will be perfect next time!
That’s awesome! Yeah 😀
Do you put the springform pan in the water?
I seem to be the only one around here that likes cheesecake (crazy right?) so I halved the recipe. Do you know about how long I would bake it for? Thanks!
I’m making this now & just realized I only used 1lb of cream cheese. ? I don’t know how I spaced that. Is it ruined? Or can I just bake it longer?
12 tbsp of butter for the crust? Is that right?? I had butter pooling and dripping everywhere… eek!
Amazing!!
Can’t watt to try this. Do you think a chocolate ganache would work?
Honestly I have no idea! But if you try it, let me know 🙂
This is the most perfect pumpkin cheese cake ever. Love all of the spices in it. Followed the directions exactly and it turned out perfect. Thank you so much!
Can this be made ahead and frozen?
Absolutely! Be sure to give it enough time to properly de-thaw though! And be sure to REALLY wrap it before freezing — you don’t want freezer burn on your gorgeous cheesecake 🙂
Hi,
I don’t have a pan wide enough to place the springform pan into with the boiling water. Am I able to skip this process? I understand its to prevent cracking, however will the cook time vary without this step? Any tips?
You didn’t say when to add the pecans and you should make clear not to add the whipping cream to the cake batter. Have a separate section for making whip cream as a topping later. Hope my cake isn’t ruined.
Making this for the second time, just delicious
Yeah! So glad you’re enjoying the recipe 🙂
Is baking it in water absolutely nessacary? I just realized I do not have a roasting pan big enough to fit my 10” spring pan! Oh no!! What do I do??
I made this pumpkin cheesecake recipe but I didnt bake my crust a head of time like it says to do in the recipe.I also put my water in the pan in the oven while the oven was preheating and I baked the whole cheesecake in the water bath at 475° for 15 minutes then I lowered the temperature to what it states in the recipe to bake it at. It turned out great. No cracks at all in my cheesecake. It was delicious.
Great adjustment tips for folks who want to try a different way. Thanks for sharing!
This turned out AMAZING!!! Lots of rave reviews. Definitely adding to the family cookbook! My question is can I make different flavors? Can I substitute things for the pumpkin? Do the remaining ingredients cook great without the pumpkin?
You know… I don’t know! The pumpkin does add the moisture needed so I fear if you take out the pumpkin it might be drier than you’d like. If you try it, let me know!
I’ve made this recipe a handful of times before and it is always absolute perfection. My boyfriends dad has been bugging me to make it again for a few years, and it’s Canadian thanksgiving so I have it in the oven right now for later tonight! Hopefully I get enough fridge time to cool it before it’s time to eat.
However, I realized after I baked the crust that I forgot to add sugar in with the graham crackers and butter. The stores are closed today and I ran out of butter so I couldn’t remake it. Hopefully it still tastes okay and I don’t ruin everyone’s lives with unsweetened crust.
Oof. Please tell me how it turned out without the sugar in the crust!
And I’m so pleased to hear how much you love this recipe 🙂 🙂 🙂
I bet this is delicious! Thanks for sharing with us at the Snickerdoodle Link Party! This will be one of my features this Saturday!
I have tried making this using the water bath method twice now and both times the water leaks into the pan. After the first time I made sure my spring form pan had no gaps (none) and that my tin foil was secure. Regardless, the water still got in ruining the cheesecake. What are you tricks for not having water seep through?
You know, you may think that your pan has no gaps but water can get in through the tiniest opening, especially as the form expands/contracts with the heat. I’ve had so many people make this without the water issue — it makes me think it’s time to get a new spring form (and a really good one — not just for getting a cake out easily). Hate to say it!!!
Use crockpot liners to wrap springform pans when baking in a water bath.
I followed this recipe exactly and it turned out perfect! I’ll never be able to get away with not making this for every Thanksgiving.
LOL! Be careful what you wish for right??? So glad everyone loved the recipe so much and sharing with me 🙂
I made this for a birthday at work. I followed it by the letter. Minute by minute. Hour by hour. I let it cool for the hour on the table and put it in the fridge. It was in there for 24 hours before it was cut. It didn’t giggle at all. Went to cut it and it was gooey in the center. I was so embarrassed! Not sure what went wrong. Oh, they ate every bite of it. Thought it tasted great. It just looked like someone had dropped it. Any suggestions? Inwill definitely make this again. Thanks. Mary Ann
Use a crock pot liner Put the tin foil The cheese cake then the crock pot liner guaranteed it will work
Hello, so what if we don’t have a roasting pan?
A deep enough casserole dish should do the trick.
You can also use the inexpensive aluminum pans you get at the grocery store.
I have made this for a couple of years now. Every year I make two for my husband’s work Thanksgiving party. I also make one for Thanksgiving and one for Christmas for my family. Everyone loves it and as the holidays get closer they always remind me that it’s pumpkin cheesecake time. Thank you for sharing this recipe. My love language is food and this recipes shouts I love you.
Thank you for such wonderful feedback! I’m so happy to hear this has become a tradition for you and your family. I also speak love through food <3 I hope it carries much joy your way.