DIY Beach Ball Pinata Tutorial
Bring summer fun to life with this DIY beach ball pinata tutorial that transforms simple materials into a colorful party activity kids will love.
This beach ball pinata craft encourages creativity, fine motor development and hands-on learning while creating a festive decoration and game all in one.
Summer time is a great time to get some added family fun time – the kids are out of school and the weather is usually fantastic!
Pull out your crafting supplies for some fun.
Then get ready to take your piñata outdoors and take turns having a swing at it until all the goodies from the inside are yours for the taking. Hmmm…. now what to fill it with?!?
Don’t miss out our other fun family-friendly kids crafts!
This post contains affiliate links.
A special thanks to Amanda at Easy Crafts for Kids for this imaginative DIY Beach Ball Pinata Tutorial.
Why You’ll Love This DIY Beach Ball Pinata Tutorial
- Creative expression: Kids can paint and decorate their own beach ball design.
- Hands-on learning: Encourages building, layering and assembling skills.
- Fine motor development: Painting, gluing and decorating strengthen coordination.
- Party-ready fun: Doubles as a decoration and interactive activity.
- Bright summer theme: Perfect for beach parties and summer celebrations.
- Memorable experience: Kids enjoy both making and using the pinata.
This beach ball pinata tutorial blends creativity and skill-building into one engaging summer activity.
Creative Ways to Play with This DIY Beach Ball Pinata
Try these fun ideas to keep the beach ball pinata activity exciting while building new skills.
- Treasure Hunt Filling: Fill the pinata with small toys, notes or themed surprises.
- Color Matching Game: Match candy or prizes to beach ball color sections.
- Party Toss Game: Roll or gently toss the pinata before hanging it up.
- Beach Theme Play: Pair the pinata with beach balls and summer sensory bins.
- Counting Challenge: Count treats as they come out of the pinata.
- Decoration Station: Let kids personalize each section with drawings or stickers.
These playful variations keep the beach ball pinata engaging while supporting creativity and imaginative play.
Activities to Pair with DIY Beach Ball Pinata Tutorial
Here are activities that pair perfectly with this beach ball pinata tutorial: a hands-on way to build skills through play.
Related Summer Activities
- Beach Sensory Bin: Add sand, shells and scoops for sensory play.
- Water Balloon Games: Create active outdoor summer fun.
- Paper Plate Sun Craft: Pair with other bright summer crafts.
Creative Extensions for Pinata Tutorial
- Rainbow Designs: Use extra colors and patterns on the pinata.
- Theme Variations: Create fruit, sports or pool-themed pinatas.
- Party Decorations: Coordinate with beach-themed decor.
This added layer of creativity keeps kids engaged while encouraging exploration and imagination.
Fine Motor and Learning Activities
- Painting Practice: Strengthens brush control and coordination.
- Layering Skills: Practice assembling and attaching materials.
- Color Recognition: Identify and match beach ball colors.
- Counting Practice: Count treats or decorations.
Gross Motor Activities
- Pinata Swing Game: Move and swing at the pinata outdoors.
- Reach and Hang: Stretch to help display the finished pinata.
- Party Movement Play: Combine with active outdoor games.
Play and Display Activities
- Summer Party Decor: Use as a colorful centerpiece.
- Interactive Party Game: Break open during celebrations.
- Photo Display: Use as a fun summer photo prop.
These activities extend the beach ball pinata tutorial while supporting creativity, motor development and hands-on learning.
Recommended Books about the Beach
When you’re done playing, dive into these fun books about beaches!
What Lives in a Shell? Pete the Cat: Pete at the BeachGood Night BeachFlotsam


Hello OceanCurious George Goes to the BeachHarry by the SeaClam-I-Am! All About the Beach


For more reading fun, Ocean Books for Kids and Beach Books for Children.
DIY Beach Ball Pinata Tutorial
Supplies Needed
- newspaper
- balloon
- white paper
- glue
- water
- paint
- paint brush
- wrapped candies (or other treats)

Piñata Instructions
First off we need to know how to make the paper mache mixture.
There are a variety of ways to do this, but the easiest is simply to mix together equal parts water and white glue.
You will stir this until it is completely mixed together.
Now that we have a bowl of our paper mache mixture, we are ready to get crafting!
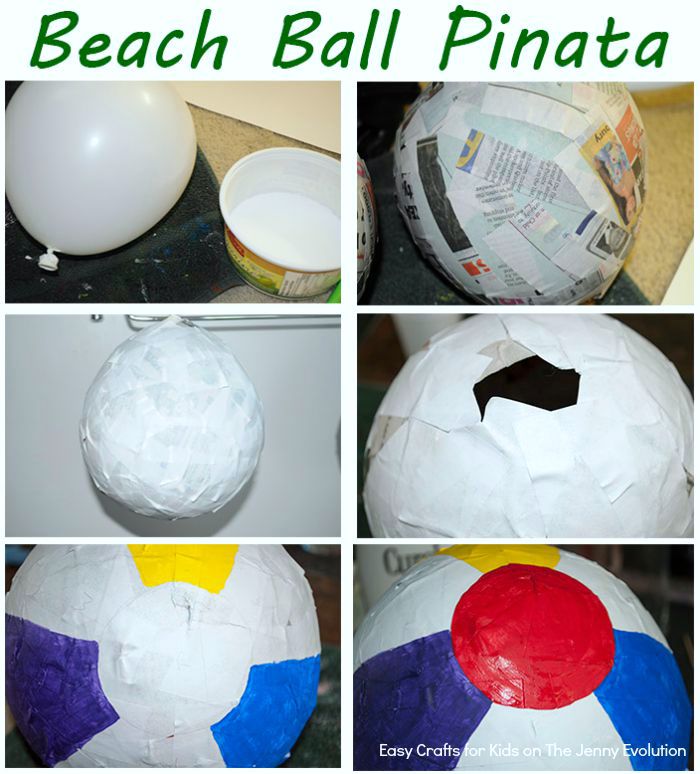
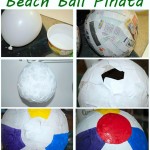
Step 1:
Blow up your balloon – try to make it as round as possible.
At this point you will also want to cut rectangles of newspaper and white paper.
They don’t have to be even or straight, it will all get covered and painted anyways.
Step 2:
We start with the newspaper layer – and get a little bit messy.
Dip a strip of newspaper in your paper mache mixture until it is lightly coated.
Wipe off any excessive so it’s not dripping like crazy.
Place this piece on your balloon.
Repeat this process until the entire balloon is covered (make sure to overlap as you go).
Leave the stem of the balloon uncovered as well do need to pop the balloon and fill it with our treats.
Step 3:
Repeat step two, but this time using the white paper. Cover all the newspaper.
This step just makes it easier to paint once it’s dry – if you don’t have the white paper it will just be some extra coats of paint.
Set your balloon to dry over night – preferably hanging somewhere to all sides dry evenly.
Step 4:
Once your balloon is completely dry it will feel fairly hard.
Pop the balloon and pull out the deflated balloon. At this time fill it with your treats.
Step 5:
Once all your treats are inside cover up the hole using the same instructions as step 2 – you can just use some white paper.
We just don’t want the treats falling out.
When you add the paper to this area you can also put a string on it if you want to hang your pinata.
Allow it to dry again.
Step 6:
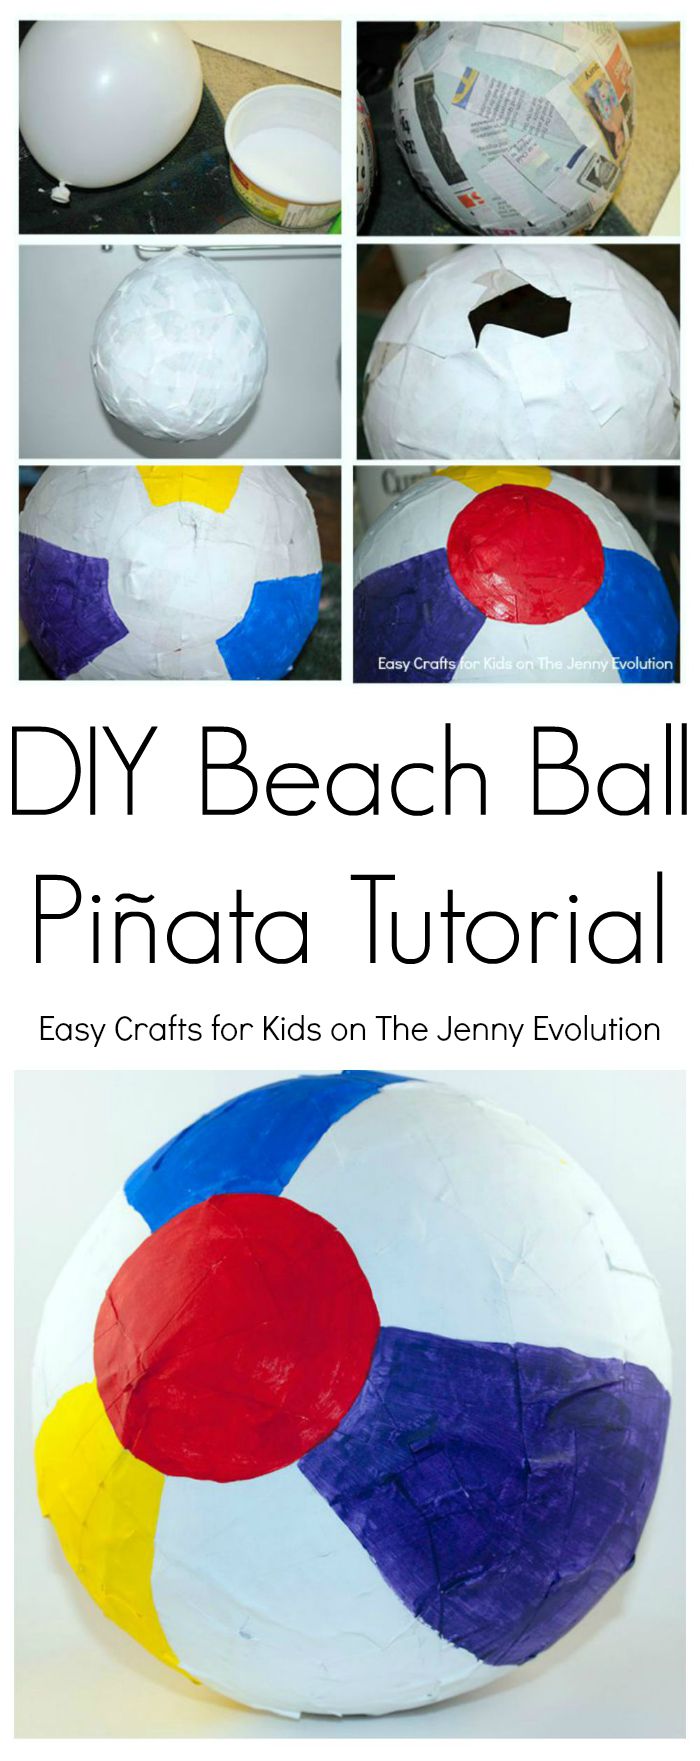
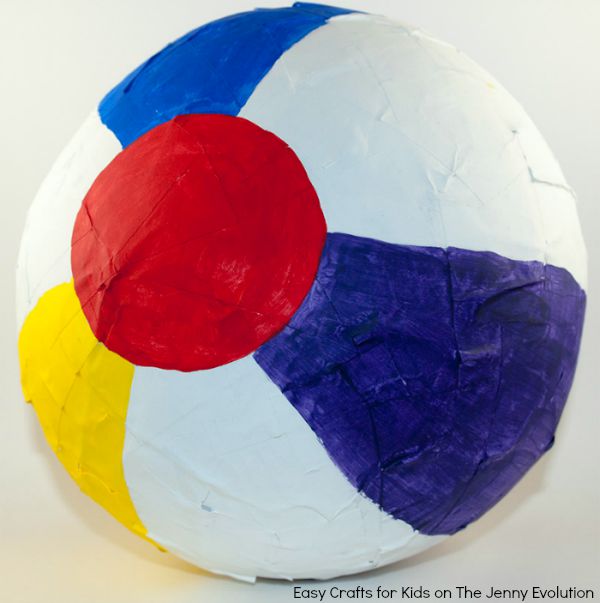
Once it is dry, it’s time to decorate.
Sketch on the areas of a beach ball with a pencil.
There is usually 6 strips and a circle at each end.
Paint it so it’s nice and colorful. Allow the paint to dry.
Now we are ready for the REAL fun!
Take your pinata outdoors and get ready to work for your treats.
You can choose to hang your pinata or use it as a beachball until it breaks.
You can even throw it and hit it like a baseball. The choice is yours!
Easy Beach Activities
Easy beach printable activities provide simple, ready-to-use pages that make learning and play fun by exploring beach themes and creativity.
More Piñata Crafts!
More piñata crafts offer fun, hands-on projects that spark creativity and add excitement to celebrations and imaginative play.
- Easy Pokeball Pinata
- Star Wars Death Star Pinata
- Faux Valentine Piñata
- Water Balloon Bash Pinata Game
- 5 Minute Pinata
About Easy Crafts for Kids
Amanda from Easy Crafts for Kids is an avid crafter! She is always creating new and easy crafts for kids for all ages. She makes all her crafts with easy-to-follow instructions and pictures. Plus, they can be made with minimal supplies and in less than 10 steps! The Crafty Critters have something for every holiday, special occasion, season and theme. Be sure to check them out!
Super cute!!!! We always make pinatas in our house. The homemade ones are so much more fun to break than the store bought ones. We have used mylar balloons too if you want a flatter shapes for other ideas (ie Cinderella’s face or batman logo). I love the beach ball idea.
I use cheap gray packing paper to cover the balloon versus newspaper so there is no chance you can see the newspaper through the paint.
Oooo.. that’s a great tip. I never thought of using mylar balloons!
And be sure to check out our guest poster for the day 🙂
This is so fun! Thanks for posting. Hello from Share the Wealth Sunday.