Clay Pot Painting for Kids


Create colorful and creative fun with this clay pot painting activity that transforms simple terracotta pots into unique works of art kids will love making.
This clay pot painting Kids Craft encourages creativity, sensory exploration and fine motor development through hands-on painting techniques.
Don’t miss out our other fun family-friendly kids crafts!
This post contains affiliate links.
Kids of any age (including preschoolers) can easily create unique and beautiful works of art that they can be proud of.
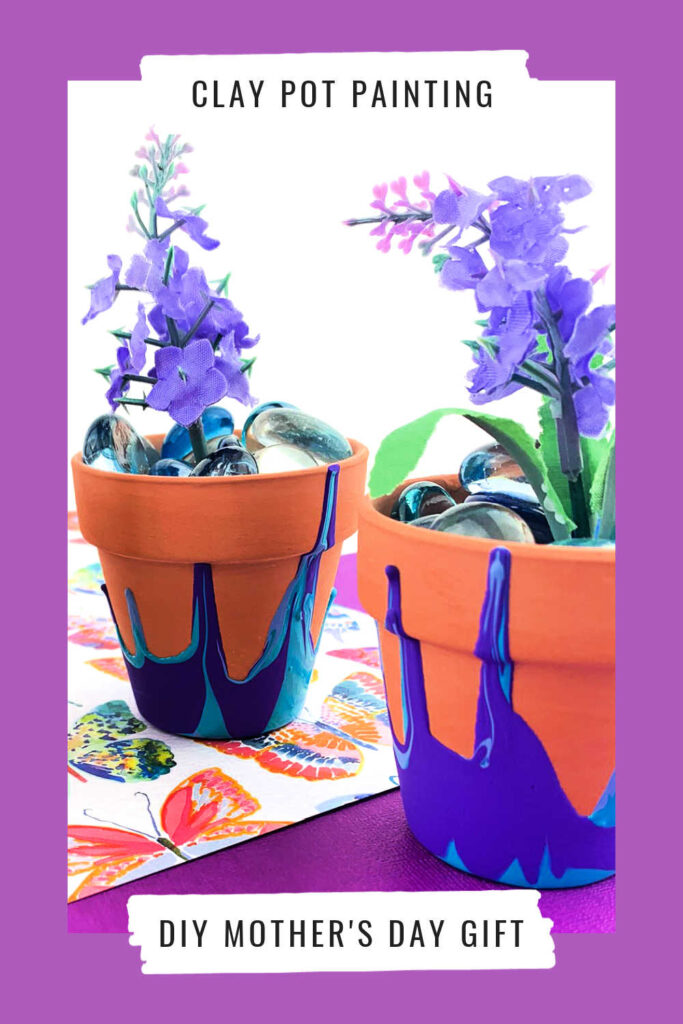
Once done, these clay pots make a wonderful Mother’s Day gift!
Why You’ll Love This Clay Pot Painting Activity
- Creative and colorful: Kids can pour and blend paint to create one-of-a-kind clay pot designs full of vibrant color.
- Hands-on sensory fun: Watching paint drip and swirl across the pot creates an engaging visual and tactile experience.
- Beginner-friendly art project: The pour painting method is simple enough for preschoolers while still exciting for older kids.
- Encourages creativity: Every paint pour turns out differently, allowing kids to experiment with colors and patterns.
- Practical finished result: The painted clay pots can hold flowers, herbs, pencils, or small treasures after crafting.
- Perfect for gifts and décor: Finished pots make thoughtful handmade gifts or cheerful decorations for home and garden spaces.
- Great family activity: Parents and kids can paint side by side, making this a relaxing and memorable creative project.
This clay pot painting activity combines creativity, sensory exploration, and functional art into a project kids love making and parents love displaying.
Creative Ways to Play with This Clay Pot Painting Activity
Try these fun ideas to keep clay pot painting exciting while encouraging creativity and exploration.
- Pour Paint Designs: Drip and pour paint over pots to create marble-like patterns.
- Fingerprint Art: Add fingerprints to create flowers, bugs or patterns.
- Nature Themes: Paint flowers, leaves or garden scenes onto the pots.
- Color Mixing Exploration: Experiment with blending colors while painting.
- Planting Fun: Add flowers or herbs to the finished pots for extended play.
- Gift Creations: Personalize pots as handmade gifts for family and friends.
These simple variations keep clay pot painting engaging while supporting creativity and imaginative design.
Recommended Children’s Books about Flowers
When you’re done playing, read these delightful Children’s Books about Flowers.
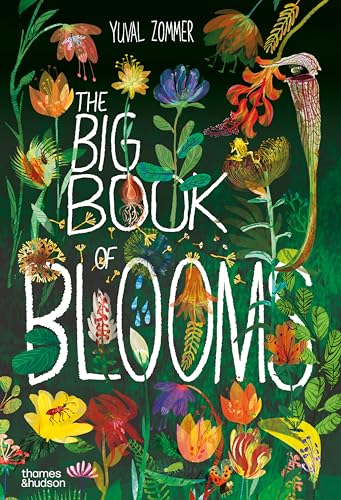
Up in the Garden and Down in the DirtWhat’s Inside A Flower?: And Other Questions About Science & NatureThe Big Book of BloomsFlora: A Botanical Pop-up Book


Miss RumphiusHello, World! Garden Time: A Book of Plants and Gardening for KidsSeed to Plant (National Geographic Kids Readers)The Boy Who Grew Flowers


Clay Pot Painting for Kids
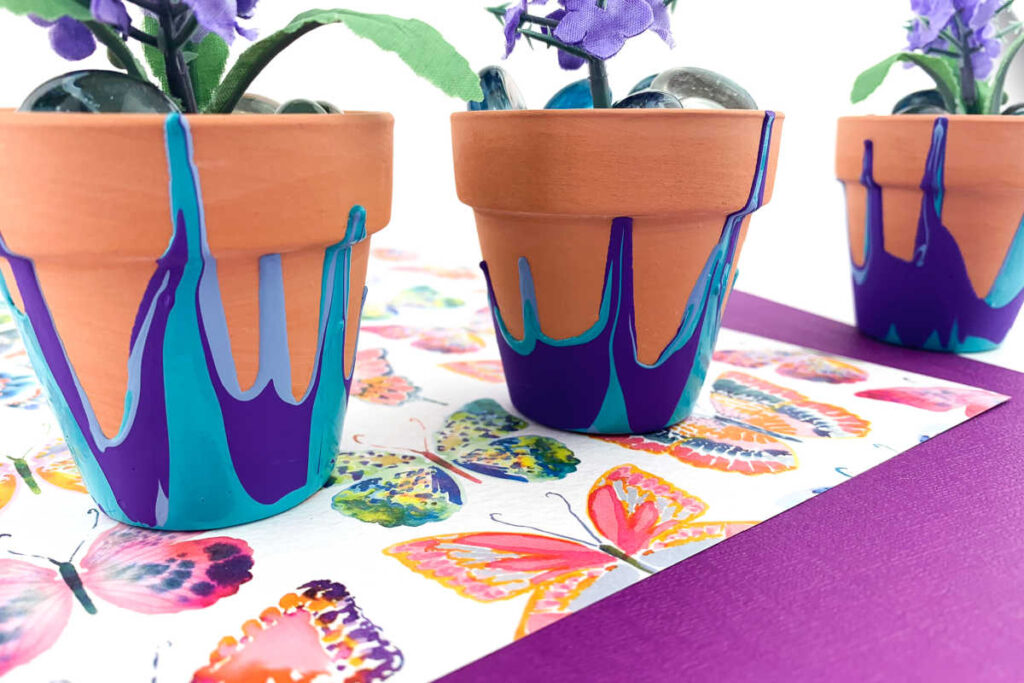
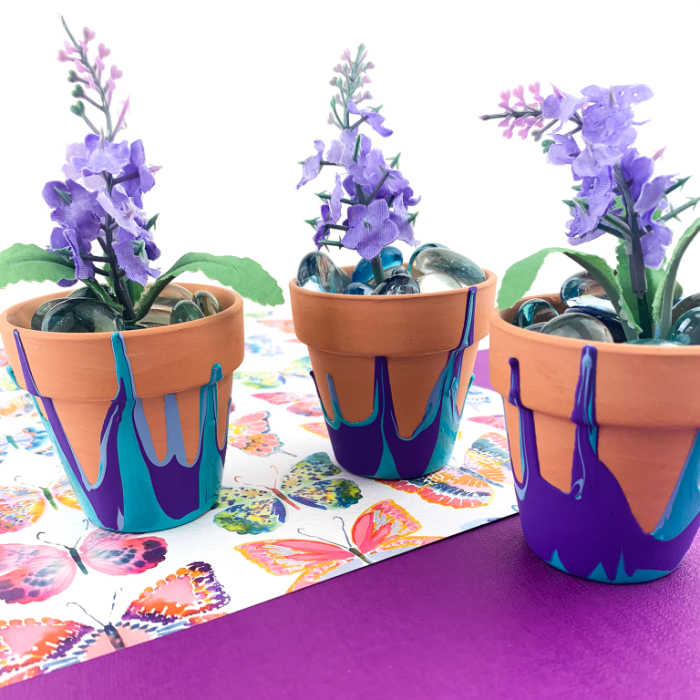
Clay pot pour painting is so easy even preschoolers can do it.
Poured onto unglazed clay pots, these decorative pieces are perfect for plants or other household items.
So if you’re looking for a great Mother’s Day craft to do with the kids, this clay pot craft is an easy and fun go-to.
Supplies

- Variety of colored craft paints
- Mini clay pots (2.5 in. diameter)
- Paper plate
- Toilet paper rolls
- Short fake flower stems
- Glass gems (or other pot filler)
Clay Pot Painting Directions
Prepare the work space. Use a paper plate for this project in case of any paint spills.
Turn the clay pots over, bottom side up.
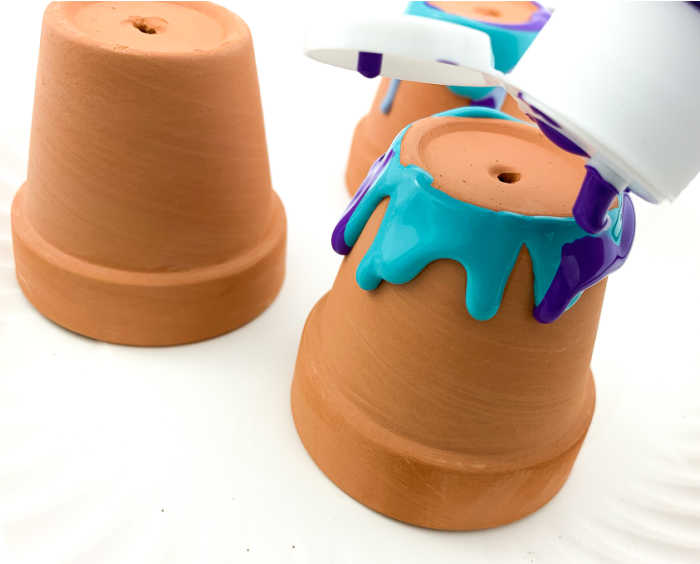
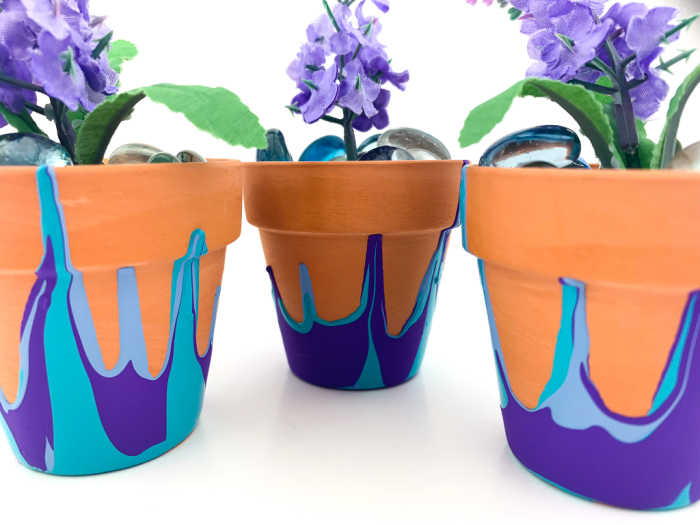
Start with desired paint color. Slowly pour paint around the bottom of the clay pot. Allow the paint to slowly fall over the sides of the pot.
Repeat this step with other colors.
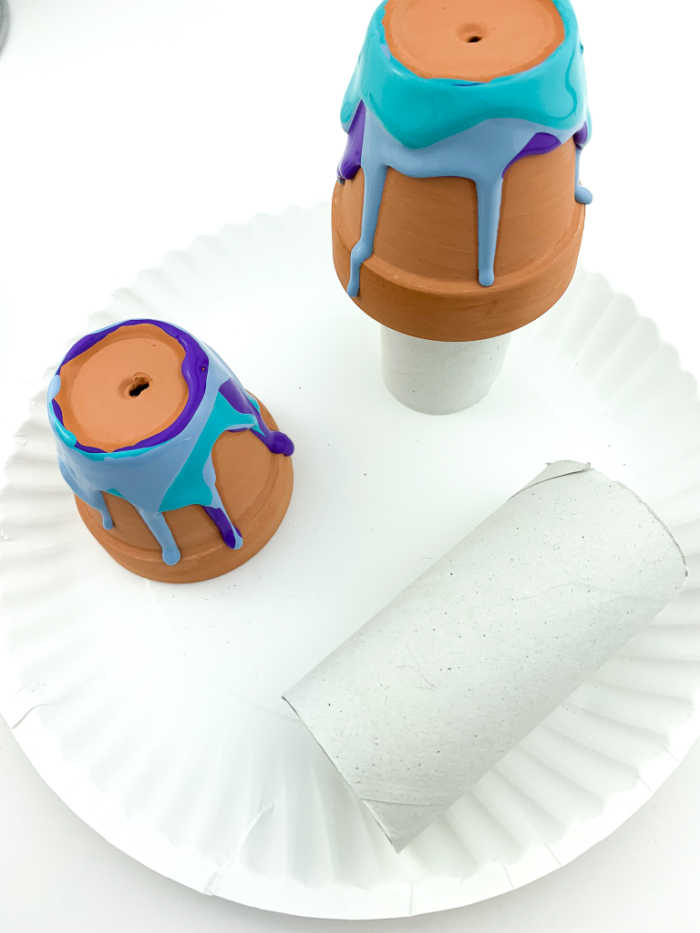
As the paint starts to slowly fall down the sides, consider using the toilet paper rolls to support the clay pots up in case the paint hits the bottom edge of the pot.
Paint will then drip down onto the paper plate instead of puddling up at the bottom around the edge of the pot.
Note: These pots easily held up the toilet paper rolls. However, if using a different size pot, you’ll need to consider supporting the pot with a different object.
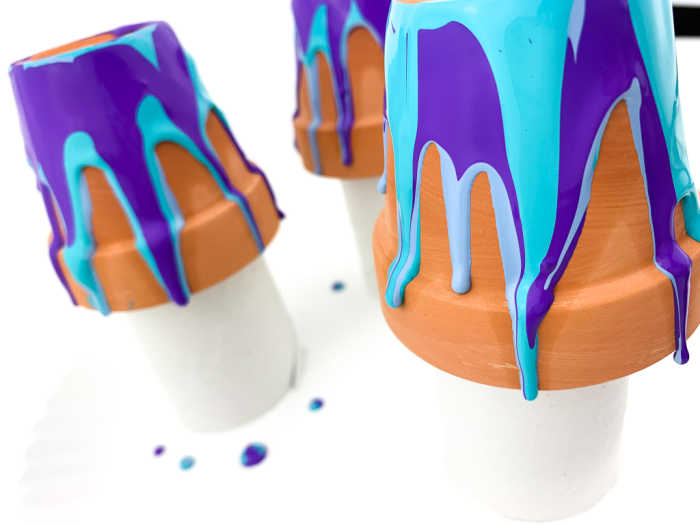
Continue pouring until you get the desired effect. You don’t want to pour too much as you’ll need plenty of drying time to complete this craft.
Once completed, set aside to dry completely.
When dry, turn the pots over and fill with the glass gems.
Place a flower stem in the middle of the pot and display!