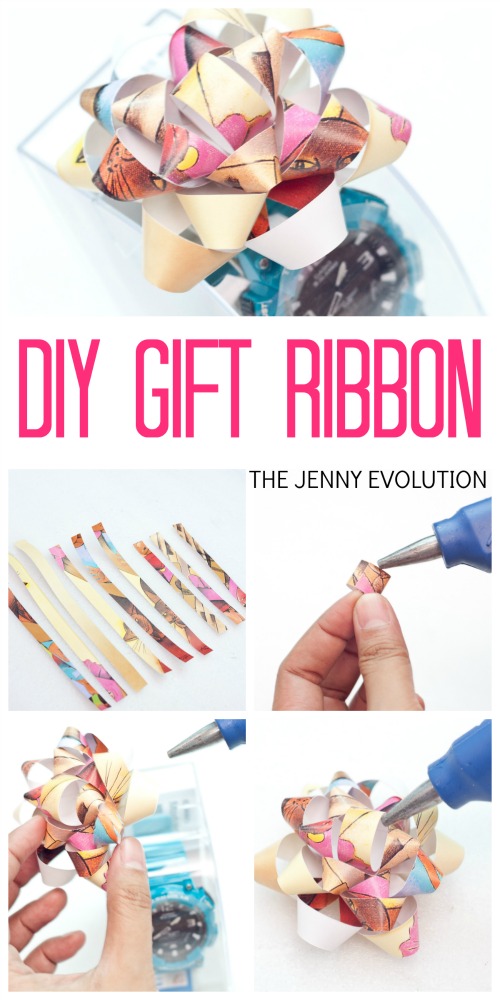
DIY Gift Ribbon Tutorial
Turn an ordinary present into inviting eye-candy with my DIY Gift Ribbon Tutorial.
As a child, I remember watching my mom create these wonderfully elaborate handmade bows.
It almost felt like magic how she could take some simple ribbon and turn it into an amazing bow.
Instead of working in ribbon, I’m showing you how to crate your very own Gift Ribbon using old calendars.
That’s right… you know this year’s calendar is done or you have last year’s in a drawer.
Of course, you can use any kind paper stock to make this gift ribbon.
This post contains affiliate links.
Make Your Own Classic Gift Ribbon
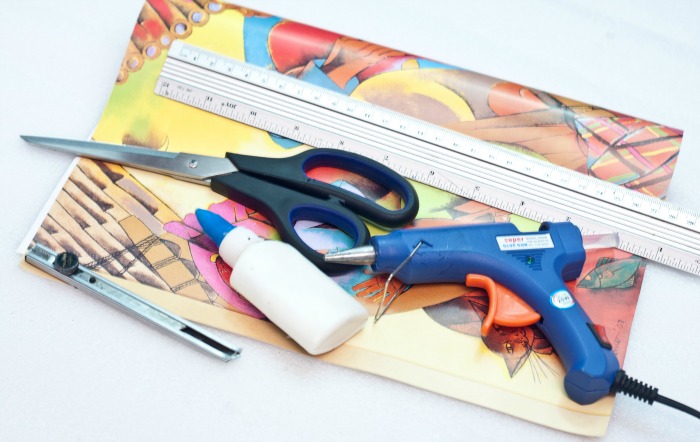
Prepare all the materials needed for this gift ribbon tutorial:
- old and colorful calendar sheets (or other paper stock)
- cutter
- ruler
- white glue
- hot glue gun
- a pair of scissors
Directions for DIY Gift Ribbon:
Step 1: Cut several strips of paper from an old and colorful calendar. Better use the part where the characters are not embedded.
Cut the strips by sets of three per length.
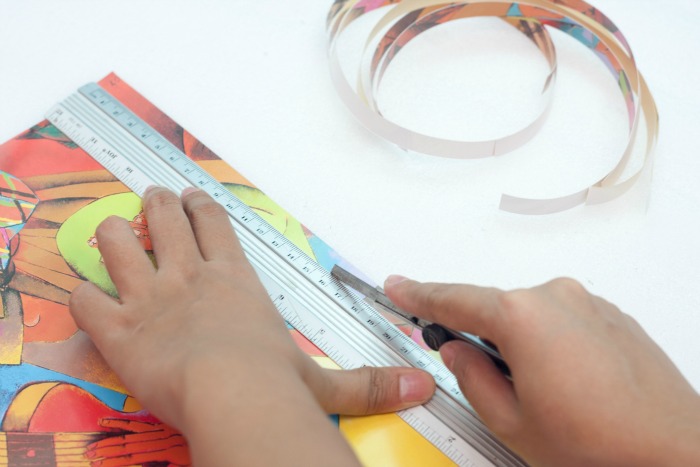
The width of the strips should be at least 1 to 1.5 centimeters.
The length should be 20 centimeters, 17 centimeters, and 13 centimeters, respectively.
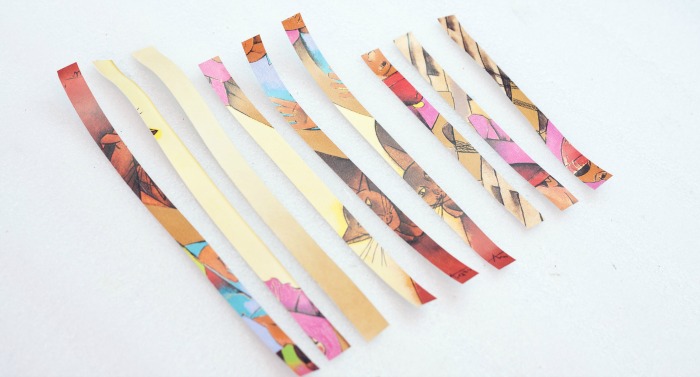
Step 2: You should have the following strips once done.
You will have a total of nine strips.
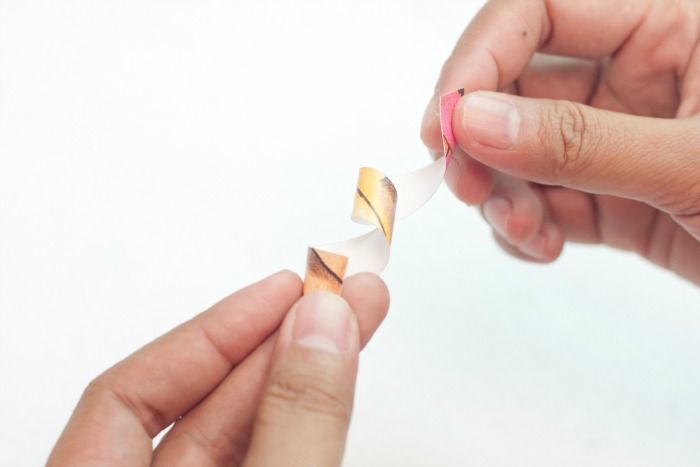
Step 3: Create a curly loop twice from one of the strips.
Double curl should be done gently as to not create some unnecessary creases on the paper.
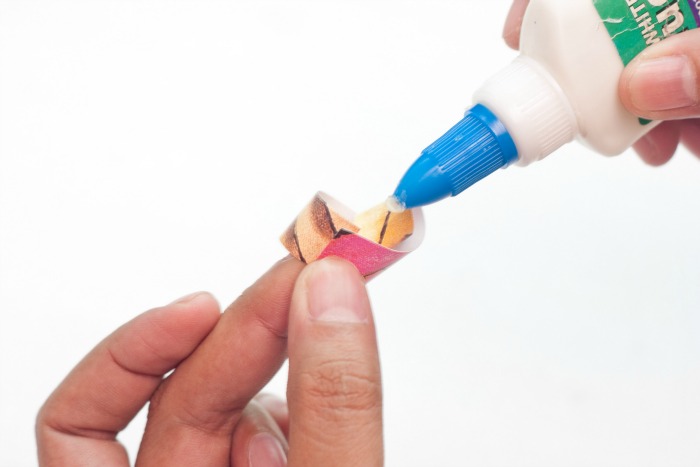
Step 4: Glue the ends of the double curled paper using white glue.
Do the same thing all throughout.
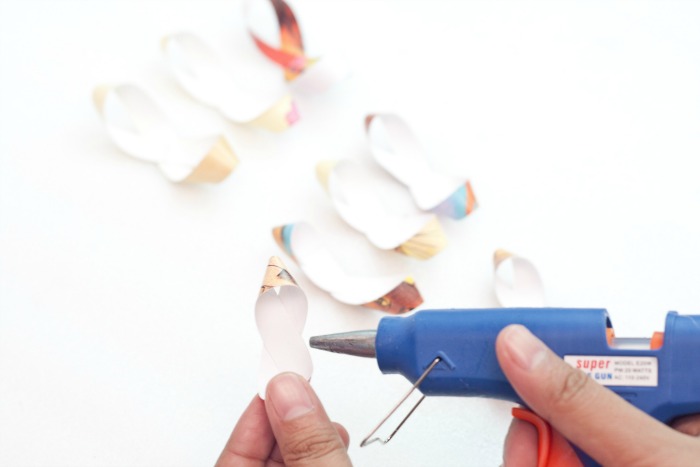
Step 5: Carefully pull the ends and while doing this a prominent intersection will be seen in the double curled papers.
You are doing the right thing if you can form a figure-8 from the strips.
Hot glue the intersections of the curled strips to stabilize the movement of each.
Make sure to group the strips according to length to avoid confusion later on.
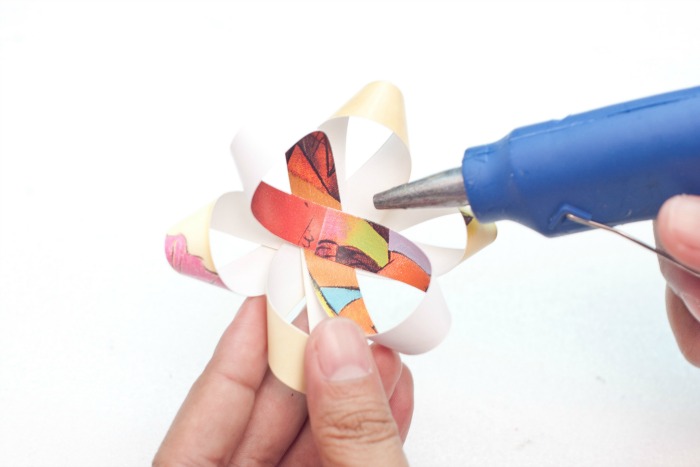
Step 6: Place one figure-8 strip one over the other.
These three strips are of same sizes.
This should look like a David star when formed.
Hot glue the intersections of the strips.
Do the same thing for the remaining two sets.
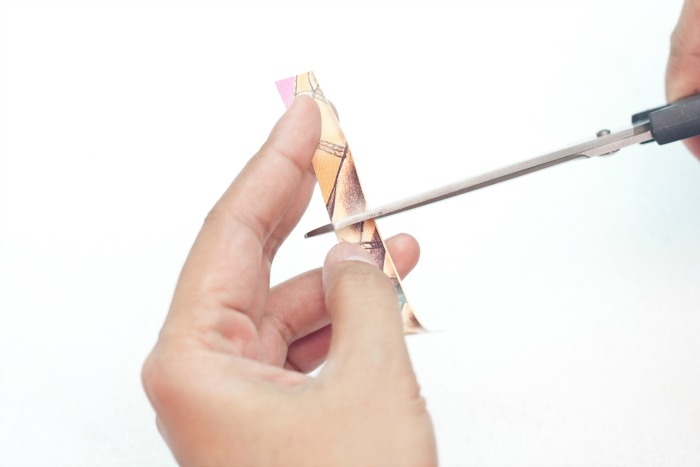
Step 7: Cut a short strip at least 3 to 4 centimeters on length but the same width of the former strips.
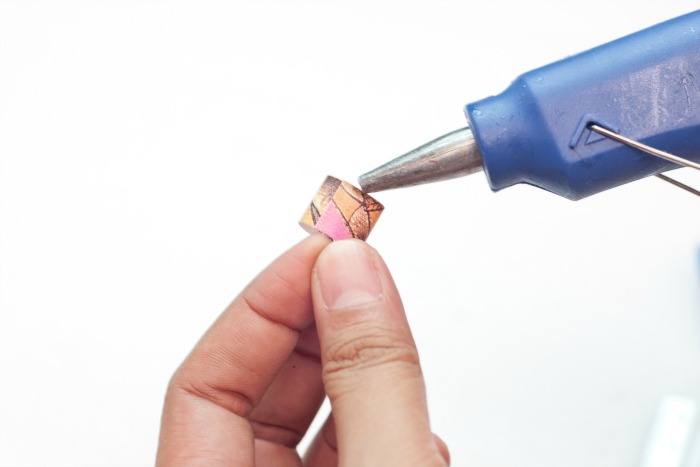
Step 8: Meet the ends of the short strip and glue it afterward.
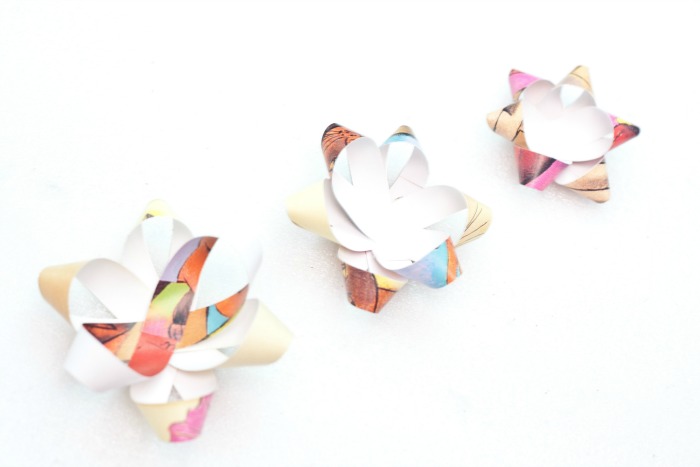
Step 9: When the figure-8 is done, you should have three of these in different sizes since they have different lengths.
Step 10: Starting from the bottom glue the biggest layer to the medium layer.
Make sure to have a window on the sides to create a better effect for the gift ribbon.
Make sure to glue the two layers generously so that it will stay in place properly.
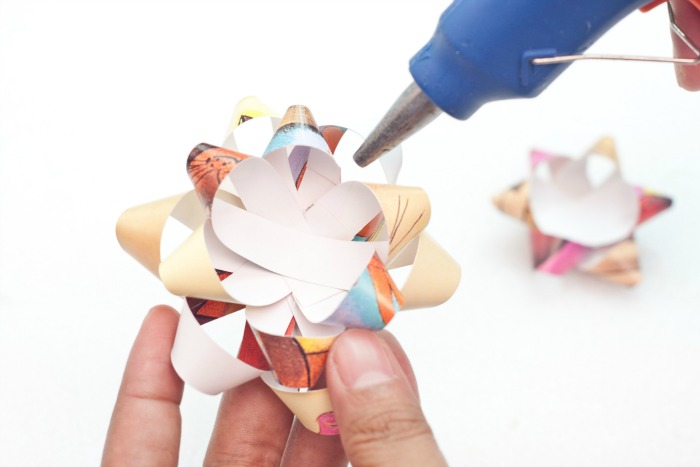
Step 11: Add the smallest figure-8 layer to the top of the first two and do the same procedure for this.
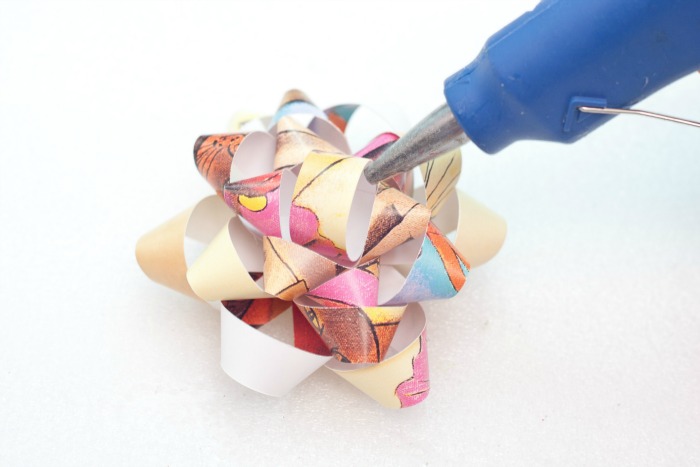
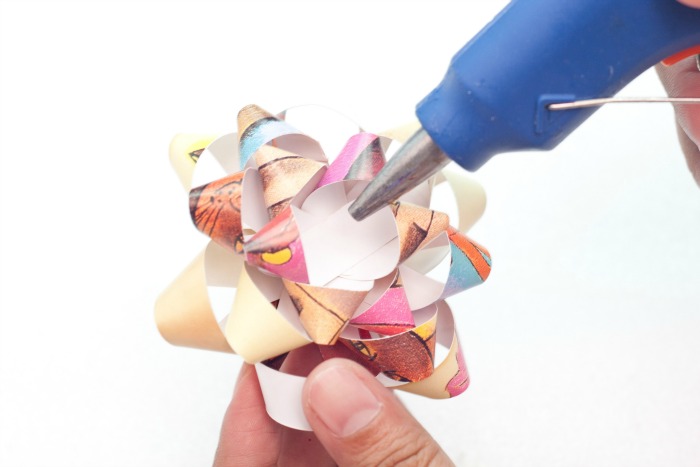
Step 12: Get the small loop and glue it on the space in the middle of the gift ribbon.
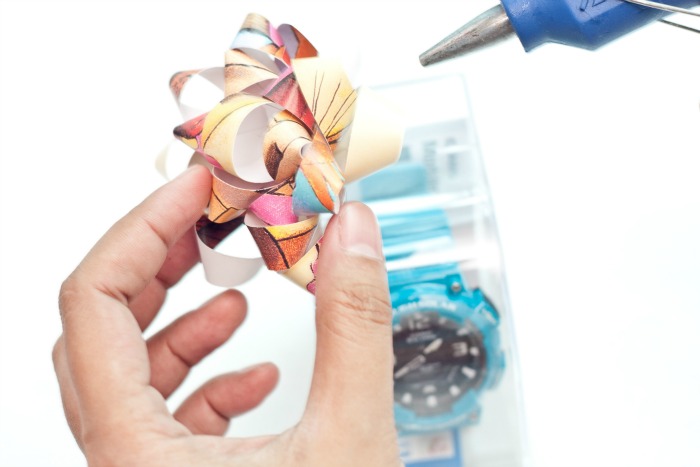
Step 13: Finally done! You can now stick your classic ribbon made from old calendar sheets!
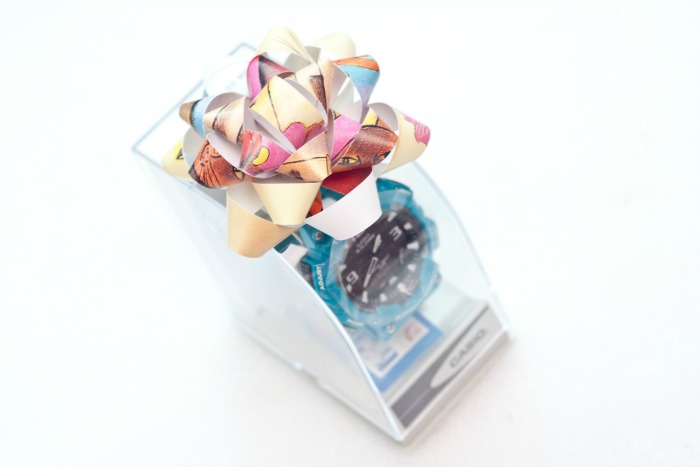
Step 14: (gift ribbon photo 15) Tada! Your gift is now ready for the holidays!
Who would have thought that this gift ribbon is made from an old calendar sheet?! Pretty nice and looks professionally done!
You can adjust the size of the strips if you want a bigger ribbon for bigger gifts.
You can also add layers of figure-8s if you want to have a fluffier version or the ribbon.
You not only saved the environment, but you also saved some pennies.
So try making more of these especially if you have tons of gifts to give this coming holiday season.
Always remember that “it’s the thought that counts.” Have fun!
Wow! Very creative
Love this!! I need to keep this in mind for my kids presents. So customizable. Thank you so much for sharing with us at Throwback Thursday.
This is a great alternative to the gift ribbons we sell. We only have 22 colors and fonts but with this tutorial you can have any color of the rainbow =)