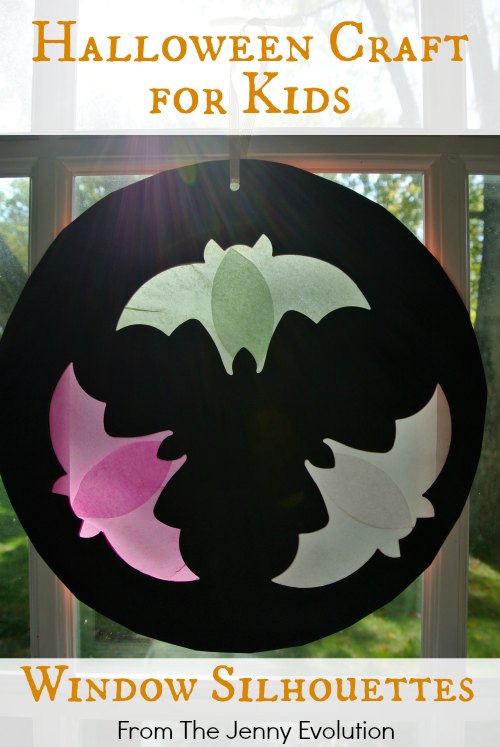
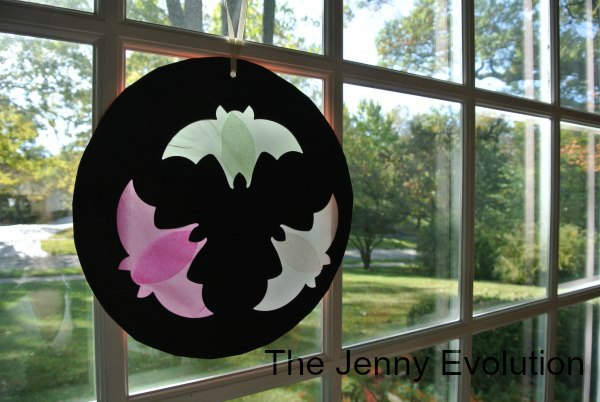
Flying Bats Window Silhouettes – Halloween Crafts for Kids

Get ready to add a touch of spooktacular magic to your windows with Flying Bats Window Silhouettes – a craft project designed just for kids!
Halloween is approaching, and what better way to get into the spirit of this eerie holiday than by creating your own swarm of bats to decorate your windows?
With a few simple materials and a lot of creativity, you’ll transform your living space into a mysterious, moonlit scene that’s perfect for Halloween with this Halloween Craft.
This post contains affiliate links.
While we’re making flying bat window silhouettes today, this tutorial can easily be changed to make pumpkin window silhouettes or any other fun Halloween symbol.
So come Halloween, it’s time to get out these fascinating creatures and turn them into a fun Halloween crafts for kids.
Recommended Books about Bats
When you’re done playing, snuggle up and enjoy these Books about Bats for Kids!
Stellaluna Bats (National Geographic Kids)Fiona the Fruit BatBats at the Library


Never Touch a Grumpy Bat!BatsOscar and the Bat: A Book About SoundAll Things Bats For Kids


Best Kids Halloween Books are a fun way to celebrate friendly bats, too!
Fun Facts About Bats for Kids
Bats are fascinating nighttime creatures!
Here are 10 fun facts kids will love:
- Bats are the only mammals that can truly fly, flapping their wings just like birds.
- There are over 1,400 species of bats found all around the world!
- Some bats eat fruit and nectar, while others catch insects like mosquitoes.
- A single bat can eat up to 1,000 mosquitoes in an hour, making them great pest controllers.
- Bats use echolocation, sending out sound waves to find their way in the dark.
- Baby bats are called pups and they hang onto their mothers as they fly.
- Most bats sleep upside down, hanging by their feet in caves or trees.
- Fruit bats help plants grow by spreading seeds and pollinating flowers.
- Some bats are tiny, like the bumblebee bat, which is smaller than a thumb!
- Bats aren’t blind. They can see quite well, especially at night.
Bats are amazing animals that help nature stay balanced while showing just how cool the nighttime world can be!
Flying Bats Window Silhouettes – Halloween Crafts for Kids
Materials Needed:
- Construction Paper
- Tissue Paper
- Scissors
- Glue
- Tape
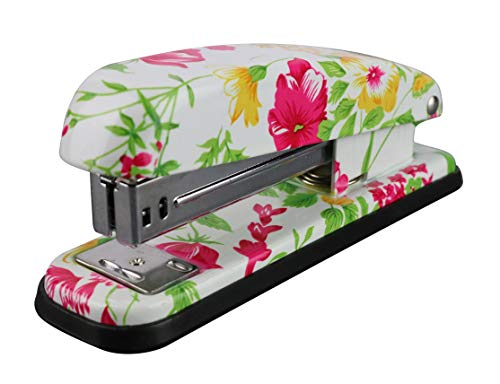
- Stapler
- Hole Puncher
- Piece of Yarn or Ribbon
Directions:
1. Staple two large sheets of construction paper together on one end.
This will help keep them in place.
2. Using a plate as a guide, draw a large circle.
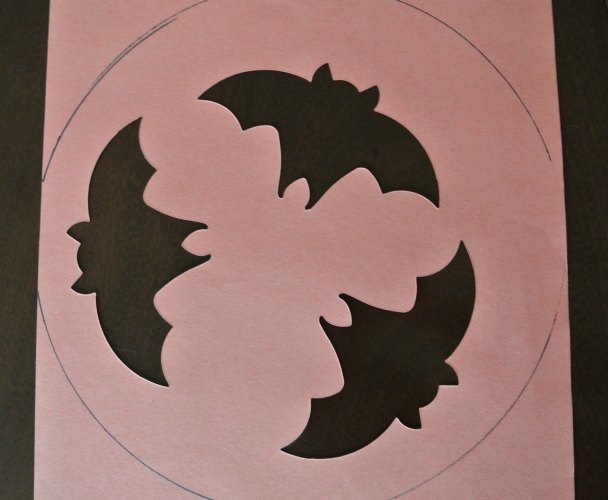
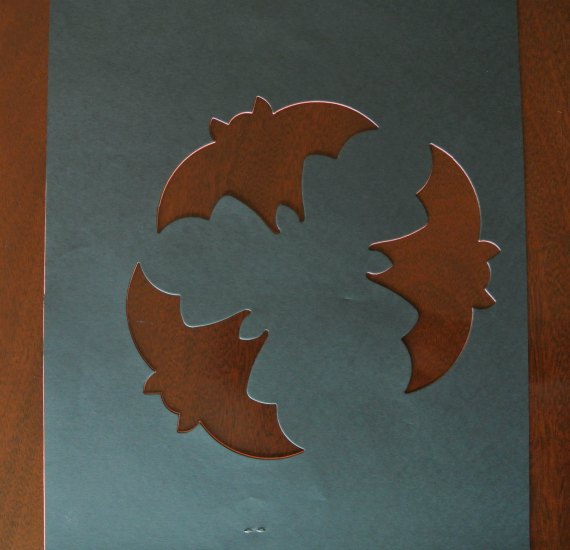
3. Draw out your bat shapes and cut out of the two sheets stapled together.
4. Cut out circles in tissue paper.
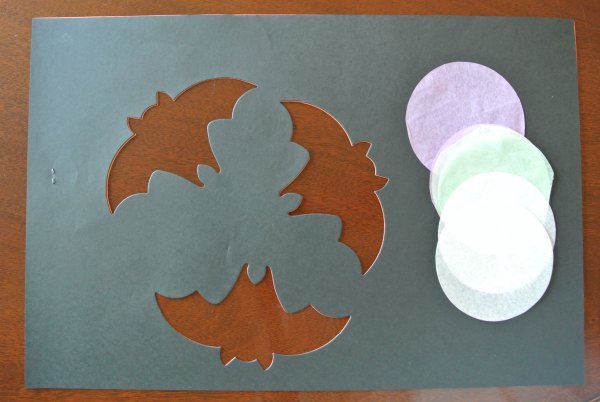
5. Overlap tissue over bat openings on one circle, careful to cover entire opening. Tape edges of tissue to one of the pieces of construction paper to keep tissue in place.
6. Place 2nd large circle on top, matching bat cutouts. Glue the two pieces of construction paper together.
7. Hole punch and insert yarn for hanger.
Easy Printable Halloween Fun!
As the spookiest season of the year approaches, dive into a treasure trove of bewitching printables that will add a dash of magic to your Halloween celebrations and learning.
- Halloween Coloring Pages
- Halloween Mystery Puzzles
- Halloween Jokes Cootie Catcher
- Witch Coloring Pages
- Halloween Fine Motor Activities – Flip and Fill Game
- Spider Preschool Lesson Plan
- Room on the Broom Coloring Pages
- Halloween Cats Coloring Pages
- Skeleton Preschool Lesson Plan
- Halloween Handwriting Activities
- Jack-o-Lantern Coloring Pages
- Halloween Multisensory Handwriting Activities
Don’t miss out our other fun family-friendly kids crafts!
Be sure to check out our spooky collection of Halloween ideas, activities and recipes for the entire family.
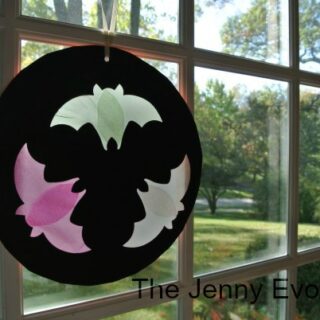
Flying Bats Window Silhouettes
Get ready to add a touch of spooktacular magic to your windows with Flying Bats Window Silhouettes – a craft project designed just for kids!
Materials
- Construction Paper
- Tissue Paper
- Glue
- Tape
- Piece of Yarn or Ribbon
Tools
- Scissors
- Stapler
- Hole Puncher
Instructions
- Staple two large sheets of construction paper together on one end.
- Using a plate as a guide, draw a large circle..
- Draw out your bat shapes and cut out of the two sheets stapled together.
- Cut out circles in tissue paper.
- Overlap tissue over bat openings on one circle, careful to cover entire opening. Tape edges of tissue to one of the pieces of construction paper to keep tissue in place.Place 2nd large circle on top, matching bat cutouts.
- Glue the two pieces of construction paper together.
- Hole punch and insert yarn for hanger.
Recommended Products
As an Amazon Associate and member of other affiliate programs, I earn from qualifying purchases.


What a great craft! I am hoping my little one finds interest in crafts soon!! Soooo many cute ideas out there. Thanks for the share!
It can be tough to find age appropriate crafts… but your kiddos will get there soon.
I love it! And I think this is one craft I could actually pull off!
This craft is so cute, great idea!
What a fun craft that is perfect for Fall! I love decorating our windows with silhouette art like this!
Have fun and let me know if you try it out, Crystal 😀
Very nice quick & easy craft, why even wee ones can put the tissue circles over the pre-cut bats! Many thanks for linking up at After School Linky Party!
Looks like something my kids will enjoy! Love the pre-cut bats..