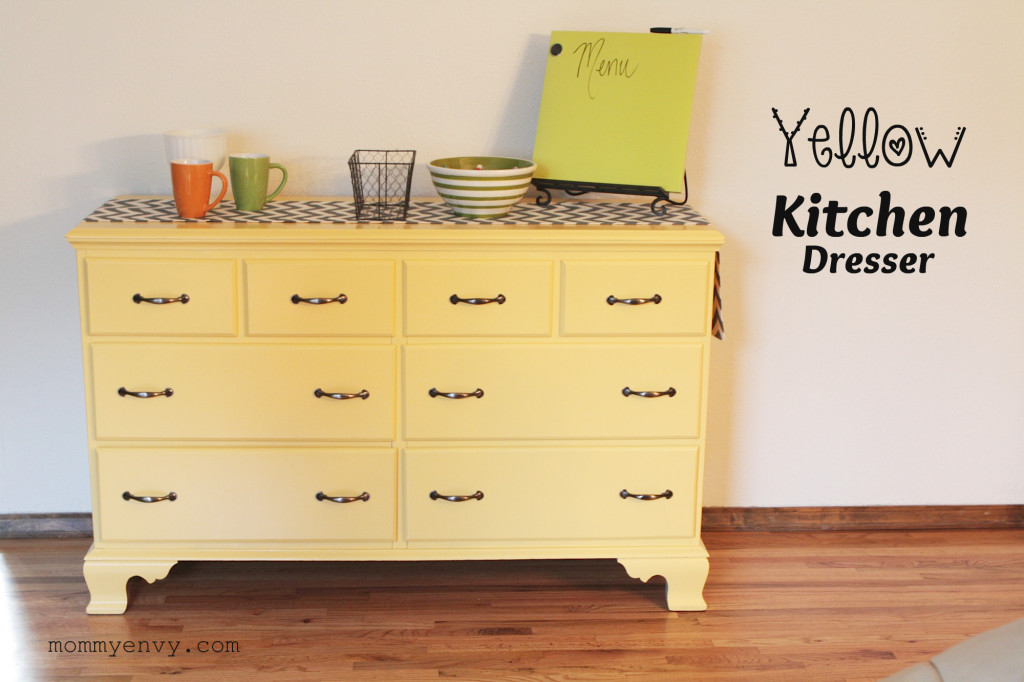
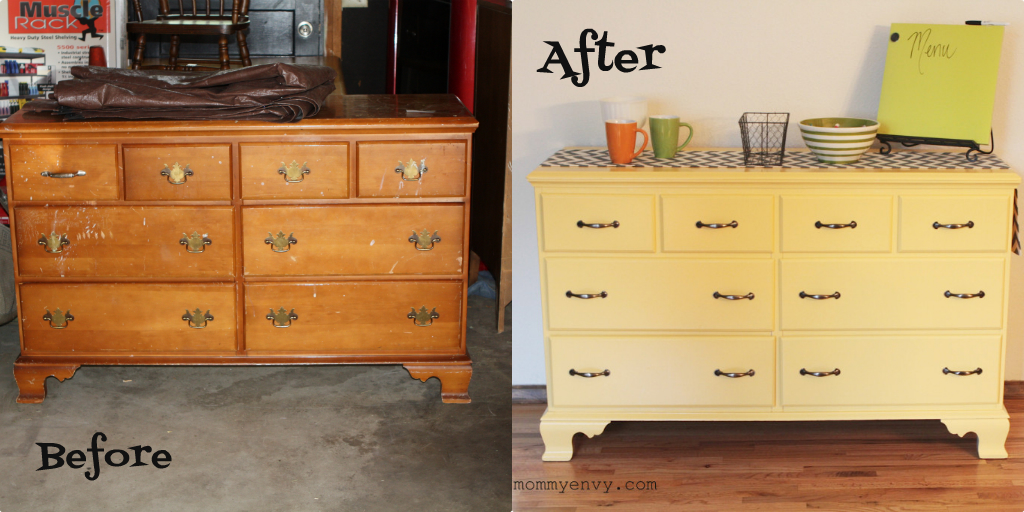
DIY Yellow Kitchen Dresser Tutorial
I am so excited to share my new kitchen dresser with you!
We have a very limited amount of cabinet and counter space in our kitchen.
When we have people over it’s a constant battle between having buffet style or have everything on the table style.
If you have this problem or had this problem please share advice!
Mommy Evolution warmly welcomes Jes of Mommy Envy as our guest blogger this week. Interested in being a guest blogger on Mommy Evolution?
My last attempt at a dresser redo, or any furniture redo, was a piece we picked up free on the side of the road.
It wasn’t wood and I thought I could cover up everything with a coat of paint and call it good.
Boy was I wrong!
Once I spray painted it the circular sanding squiggles revealed themselves.
Note: You can’t cover those up! You have to sand them out with a fine grit.
That led me to cover it with gift wrap and Mod Podge.
Before you cringe it could have been cute but after cutting 1 in by 1 in squares and Mod Podging each one on you kind of lose your creative drive.
I wanted to leave the darn thing in Utah when we moved but the hubs knew I spent so much time on it that he said we had to take it.
So our garage has become the ugly dresser’s new home.
I am proud to say I sanded, primed and painted two layers on this bad boy!
The color is Jackfruit by Behr in a high gloss.
I chose a high gloss because it will be in the kitchen with high traffic.
I hit the dresser jackpot the day I bought this one.
I also bought a 1960s dresser that will make an appearance later and a cute little rocking chair.
Can’t wait to get started on those!
*Instructions*
I’ve had several of you ask for instructions and I am so happy to share!
Step 1. Find a great piece of furniture.
I am new to this too and I think I lucked out but
I will post more about this as I become more of an expert.
Step 2. Gather your supplies.
There’s nothing worse then getting into a groove only to find out you need to make another run … or two… to Home Depot.
I used a Black and Decker random orbital sander with 220 grit paper, a 220 grit sanding block, wood filler, primer in a spray can, behr paint (1 quart and only used half), a roller for smooth surfaces (or paint sprayer if you have one), and new hardware.
Step 3. Rough up your entire piece with the sander.
You can do this by hand but it will take some time and your arms will get tired.
The hard to reach places will take some hand sanding, this is what the block comes in handy for.
You’re not stripping down to the wood! This process takes some patience but not that much patience.
Step 4. Fill in any scratches with the wood filler.
A note from my mom – You can tell when the wood filler is dry and can be sanded down if the color of it is lighter and it sands like wood (fine dust not beaded up mess).
Make sure your surface is smooth before moving onto the next step.
Step 5. Spray on your primer.
I was being super careful about this step and maybe that’s why it turned out so smooth or maybe I just took my time.
But you do end up softly sanding this layer too so don’t take too much time on it.
My primer said to wait 1 hour before sanding. In some places I did and in some I felt like it was dry so I didn’t.
Step 6. Gently sand the primer with the 220 grit sanding block.
This helps the paint adhere to the surface.
Step 7. Make sure everything is ready for painting before this step.
It’s easier to paint everything at once.
Start rolling. It looks a little splotchy on this coat but the second coat will clear that up.
Step 8. Let the surface completely dry.
Rough up the surface with the sand paper or steel wool if you have it.
Step 9. Paint your second coat just like the first.
This coat should look more smooth.
I was surprised that a lot of the splotchy look went away with the second coat and the paint started to smooth out as it dried.
It’s not a perfectly smooth surface but unless you are squinting and standing really close you can’t see it.
Good luck! Send me pictures of your projects!
Thanks to Jes of Mommy Envy for being our guest blogger this week. Jes is a self-proclaimed feisty, stubborn and true Texan to the core. She has always had a passion for trying new things. You can read more on Mommy Envy.


Gorgeous! I am just working on a dresser right now so thanks for the tips.
A second life, my friendin love made it also.
That dresser looks great, I love the color! Thanks for linking up with us for Social Media Sunday!
Stopping by from the What We Love Wednesdays link up! Your dresser turned out great! Have a great rest of the week!
I love that makeover!! So beautiful. Perfect color 🙂 I love how fresh and great it looks in the kitchen 🙂 Thank you for linking up with us at A Mama Collective 🙂
i love the dresser redo! you found a great yellow too. 🙂
Wow, this doesn’t even look like the same dresser. Love the transformation. I would love to have you link up to my Inspire Me party that goes live on Monday at 2:30 PT. http://www.astrollthrulife.net Hope to see you there. Hugs, Marty
I love the way that your dresser turned out! I have a dresser that looks just like it-but it is wood. I really like that color as well. Glad you posted at the Pin It Thursday link party. I’ve pinned, liked, twittered and G+-ed your post. I’d love it if you dropped by for a visit at http://www.kneadedcreations.com . I look forward to seeing you over there! Deb @ Kneaded Creations.
I love the Makeover, Doesn’t even look like the before picture You would never guess. Great Job!
Thank You for Linking Up @ Friday Pin Fest.
– Yasmina
Great tutorial!
-Rocko Barbieri
I LOVE IT! Now I just need a bigger kitchen lol
This looks AMAZING!! I love the color and the new hardware, so beautiful.
This turned out sooo nice! I have a dresser to re-do and I have been a little afraid! I think I can do now!
Jessica from http://www.sparklesandglue.com
Glad to infuse a little inspiration into your dresser re-do 🙂
It looks great, we have a similar piece in our kitchen, it was a bedroom piece from Target. It has drawers down the center but doors on the side. We use it for a liquor cabinet, locking it all up, we have teenagers, and for extra napkins, candles, candle holders and all the other dining knickknacks. When we have guests we use it as a buffet. It helps a lot. I want an island counter/bar top, someday…I hope.
I digress, lol, I love the yellow, and it looks great, you did a great job refinishing it.
LOL. I loved the yellow of this project, too. And we actually do have an “island counter.” It’s a bar on wheels that I use as my cooking space. Some day to have the dream kitchen!!!
I love it, love it!
I’m on a lookout for a dresser to refurbish. Now I’m thinking I might go for a yellow dresser- so cheerful and pretty!
I hope you will join us for the Idea Box Party this week:
http://milaslittlethings.com/2015/04/idea-box-thursday-link-party-4.html
xx
Mila
Such a great project and fun color! Great tutorial and instructions! Thank you for sharing on Show Me Saturday!
That is an amazing result! Good work on transforming that old dresser into a really cute kitchen hutch.
Thanks for linking this post to #PureBlogLove link party. The party starts every Thursday night at 8 p.m. EST and runs through the week end. I’m hosting over at http://www.homemadefoodjunkie.com. I love your ideas, please link up again next week!!
What a lovely color you chose for your dresser and it’s perfect for that needed storage in a kitchen. I love how you transformed it. Thank you for sharing at Share It One More Time. Cathy
What a lovely transformation! I love the yellow you chose!
I’d say you hit more than the jackpot! You did an amazing job redoing this piece. And BEHR is always the way to go!! Can’t wait for you to show us your next one and the rocking chair:) Thanks for sharing with us at Home Matters linky party. We hope you will join us again at this Friday. Feel free to bring a friend!!
Such a happy dresser! Thanks for sharing! You are one of the features at the Make it Pretty Monday party at The Dedicated House! Yes, I’m finally back to blogging. Here is the link to this week’s bash. http://www.thededicatedhouse.com/2015/04/make-it-pretty-monday-week-133.html Have a lovely week. Toodles, Kathryn @TheDedicatedHouse
Awesome! Thanks for the feature 🙂